
Greetings from sleepy Turtle Cay Marina during the peak of summer and the Atlantic hurricane season. While Janine visited Europe, I spent my days working on various boat projects, hiking with Kiwi and enjoying the remote Caribbean coastline. Take a look at what happened while the storms raged offshore.
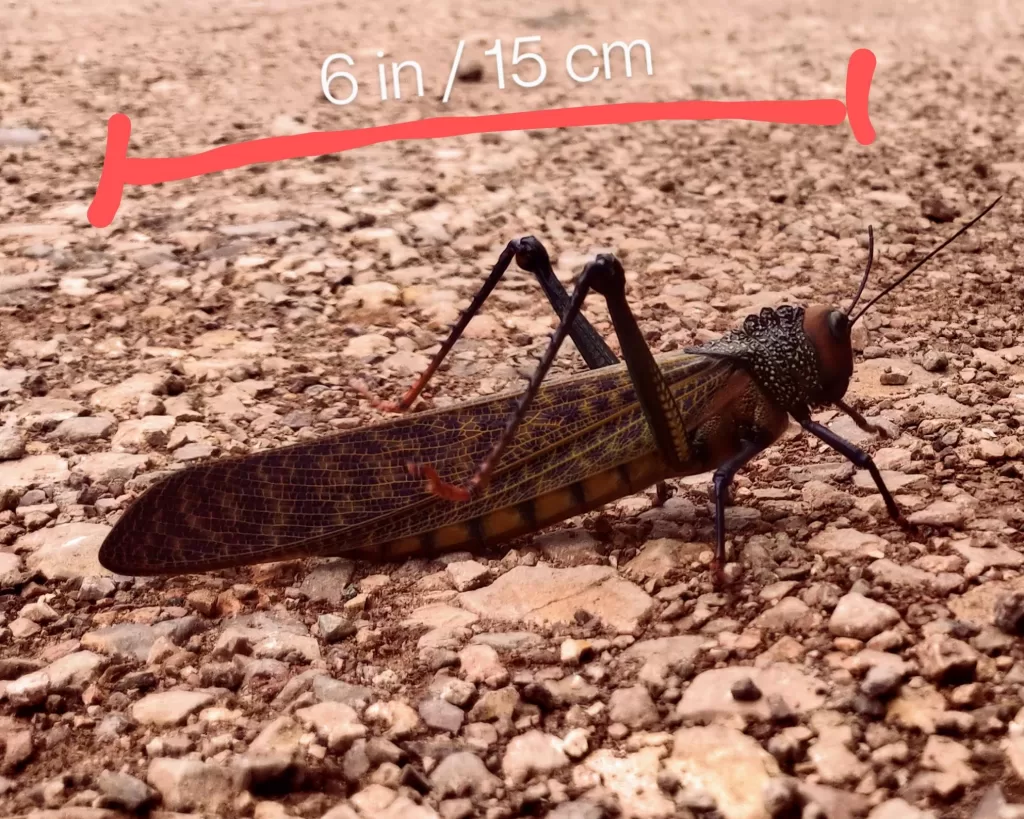
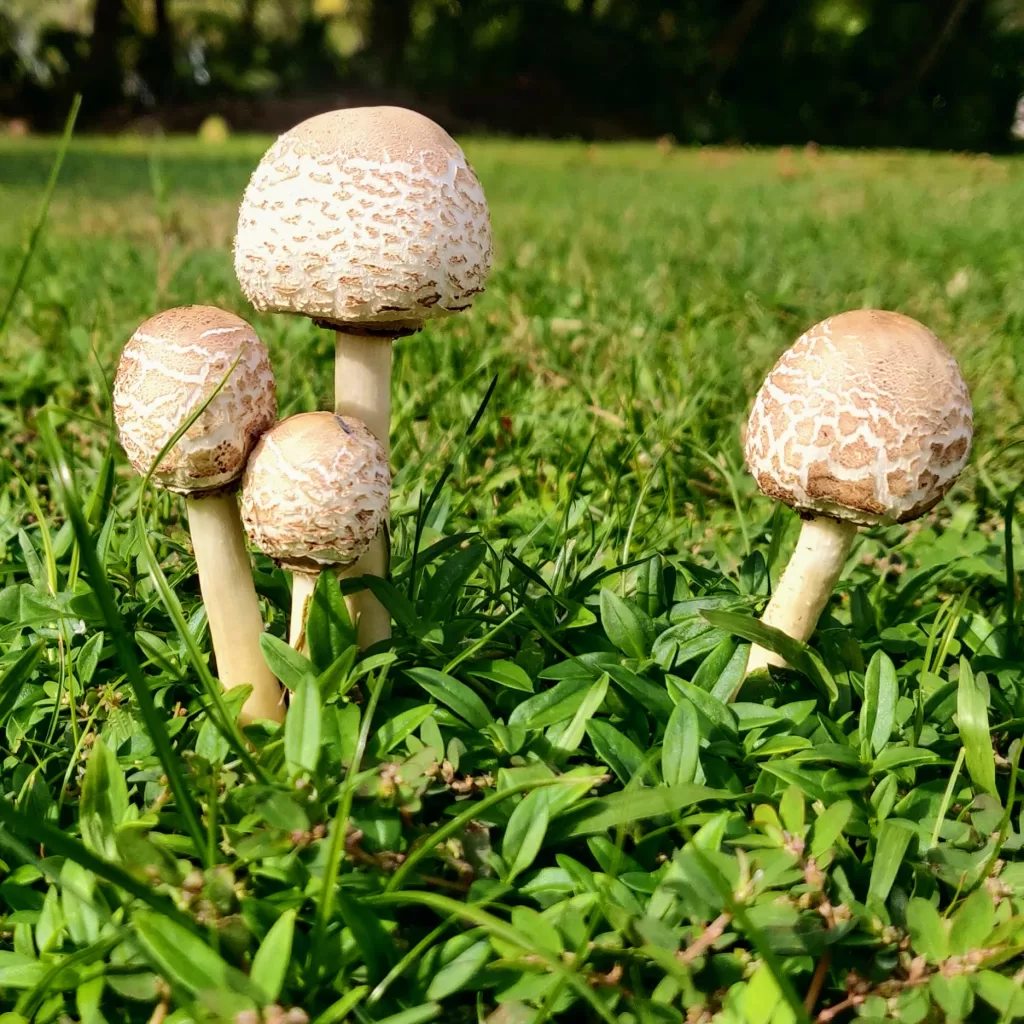
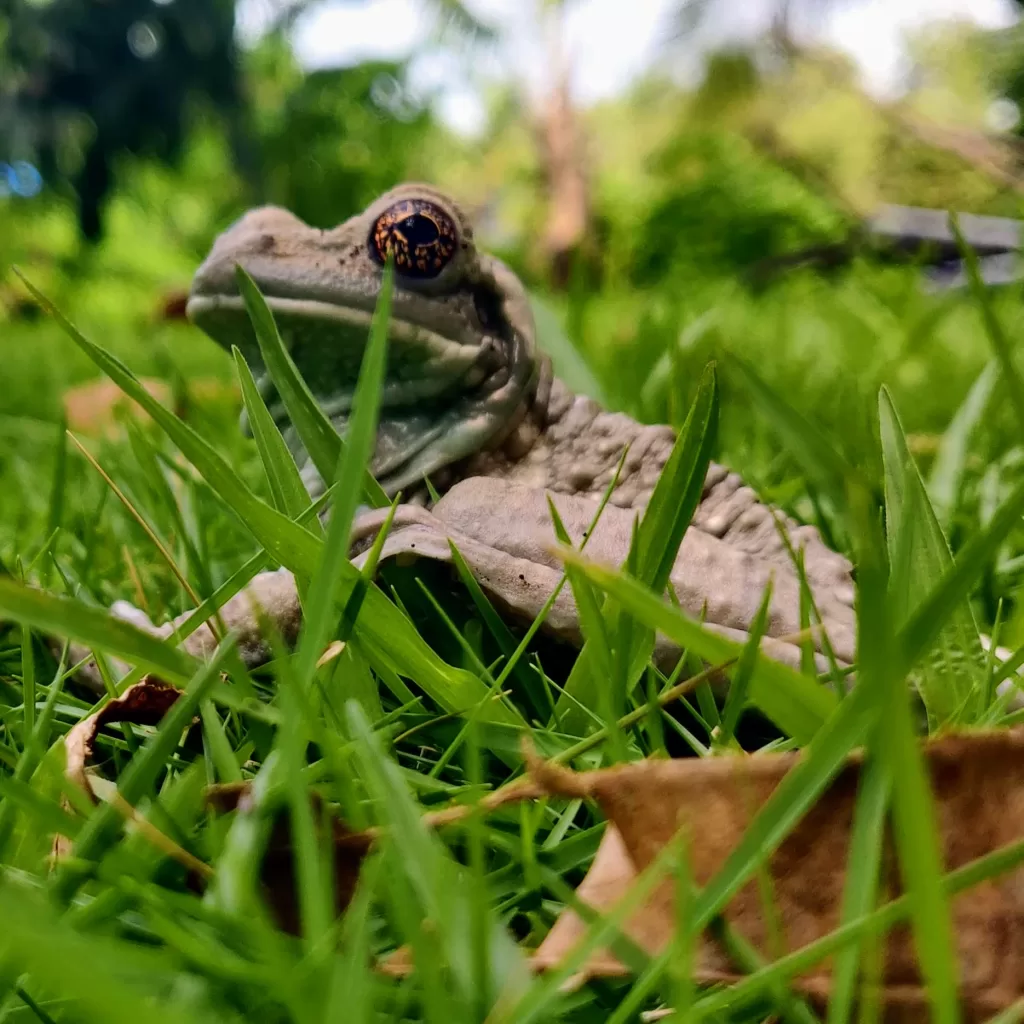
Situated beyond the major cities and towns of Panama’s Caribbean coast, Turtle Cay Marina is surrounded by wilderness. Onshore, the jungles and swamps extend into the mountains of the Chagres National Park, while the coastline is encased in coral reefs. For over a month, Kiwi and I walked all over the marina grounds, and ventured across nearly all of the neighboring properties as well, encountering numerous insects, birds, monkeys, mushrooms and plants along the way.
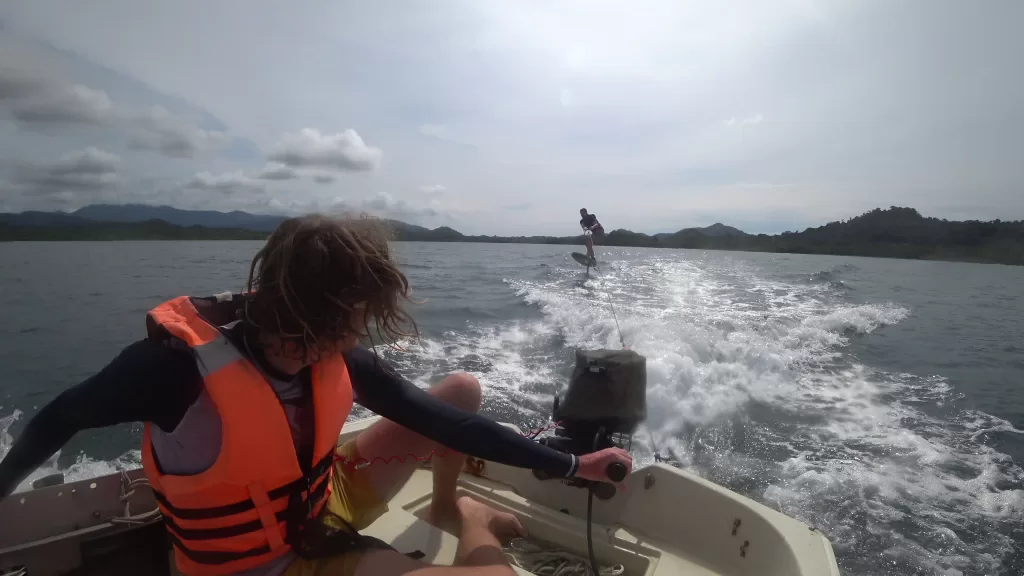
The distant storms sent waves crashing in to the nearby shoreline for much of the early part of the summer. But beyond the breaking waves, the clear water revealed numerous reef fish, sharks and a plethora of curious squid that often accompanied me while I snorkeled. I even had the opportunity to try out foil-boarding thanks to a neighboring sailor and new friend!

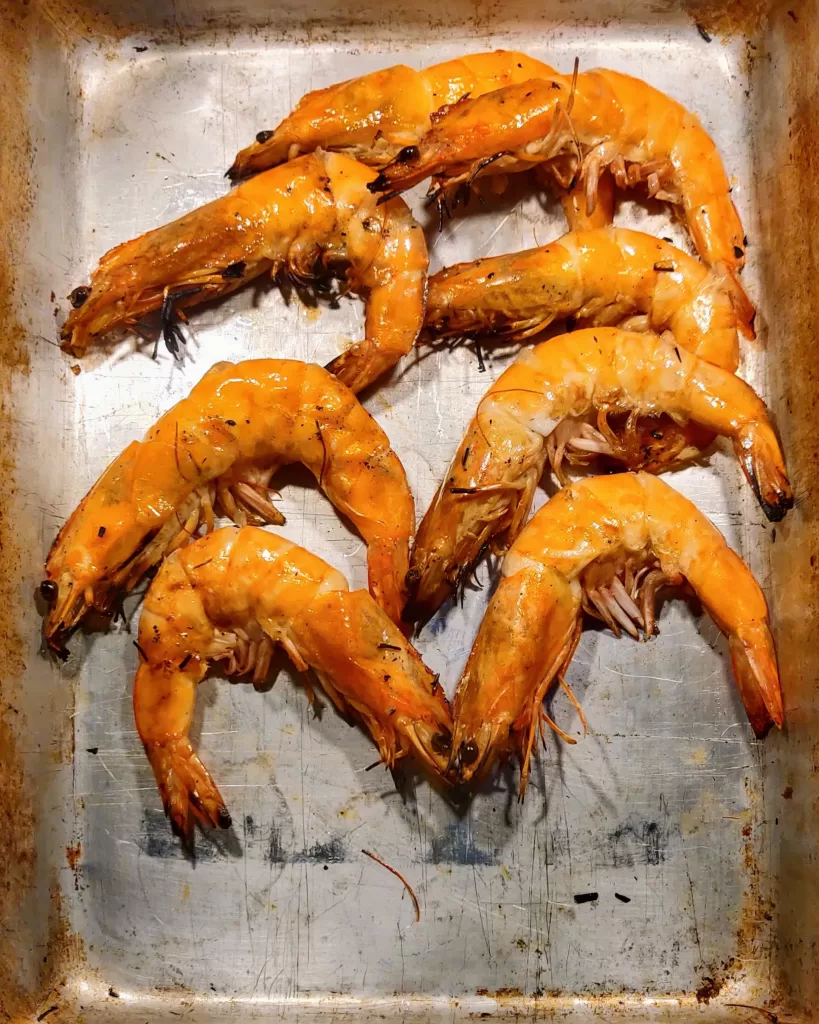
As noted previously, obtaining provisions was a bit of a challenge in such a remote part of Panama. Thankfully, Alvaro and his team routinely delivered fresh fruits and vegetables to the marina weekly, and even brought fresh camarones on ice to satisfy any seafood craving.
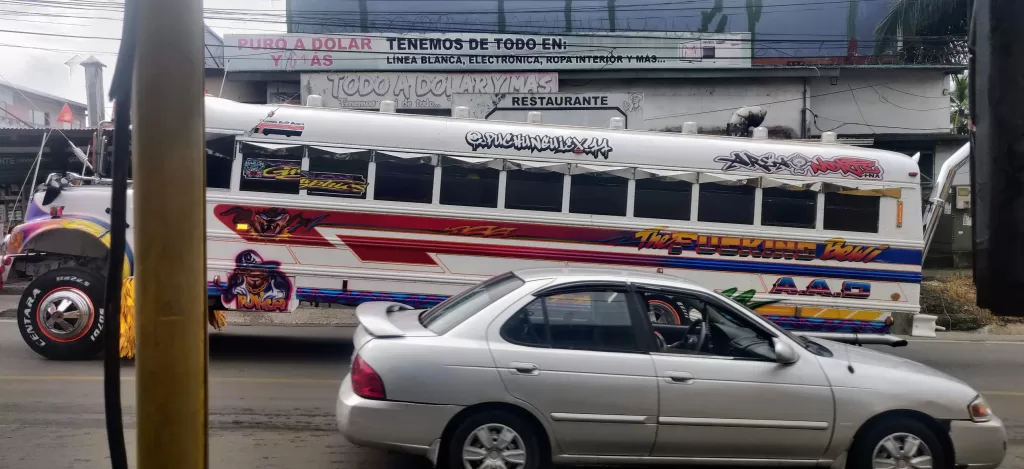
For other hardware, supplies and staples, I periodically caught a ride into Sabanitas or Colon onboard the local bus from Nombre de Dios. The trip took much of an entire day to complete; first a 20 minute drive into the small town of Nombre de Dios with one of the marina staff, then a bumpy, sweaty 2 hour trip aboard a colorfully decorated schoolbus into Colon and its outlying suburbs. After shopping, the trip was reversed and I usually arrived back onboard tired but with plenty of supplies.
Dinghy Upgrades and Repairs
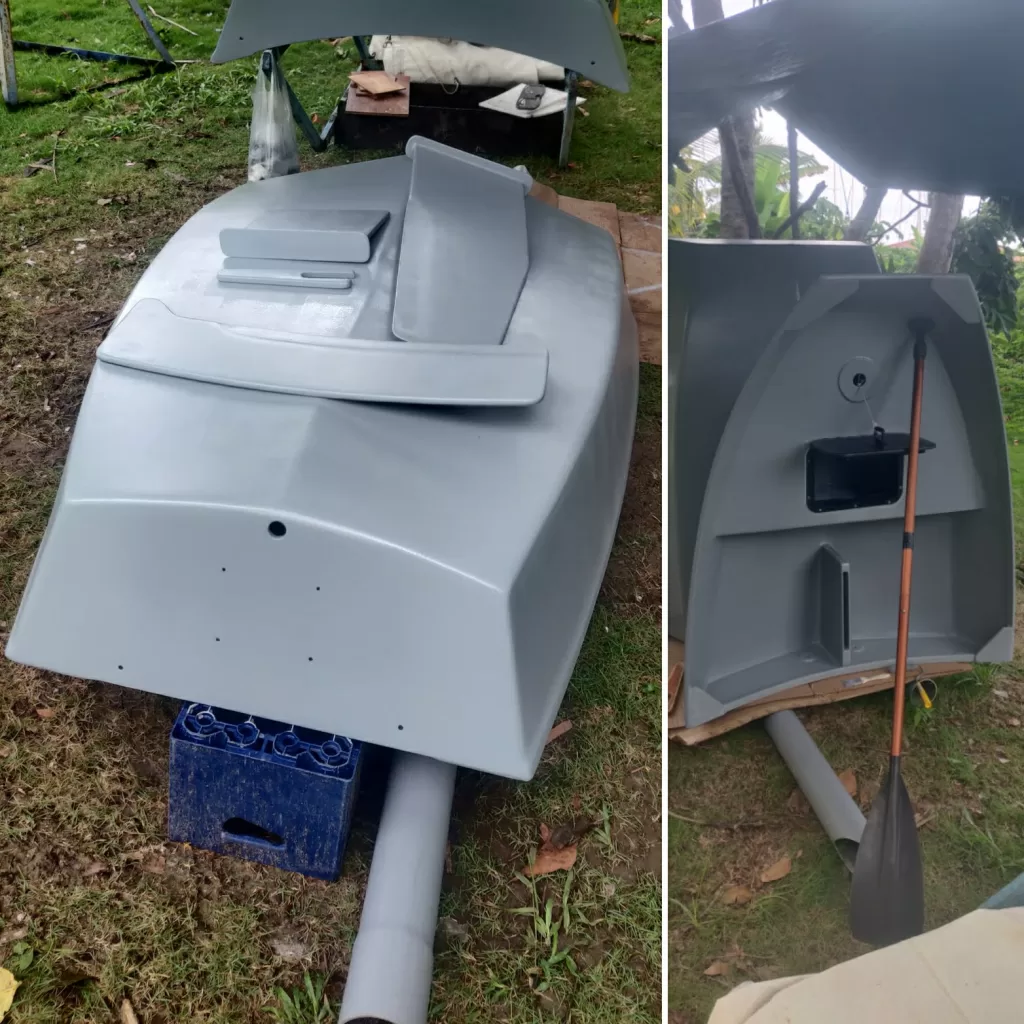
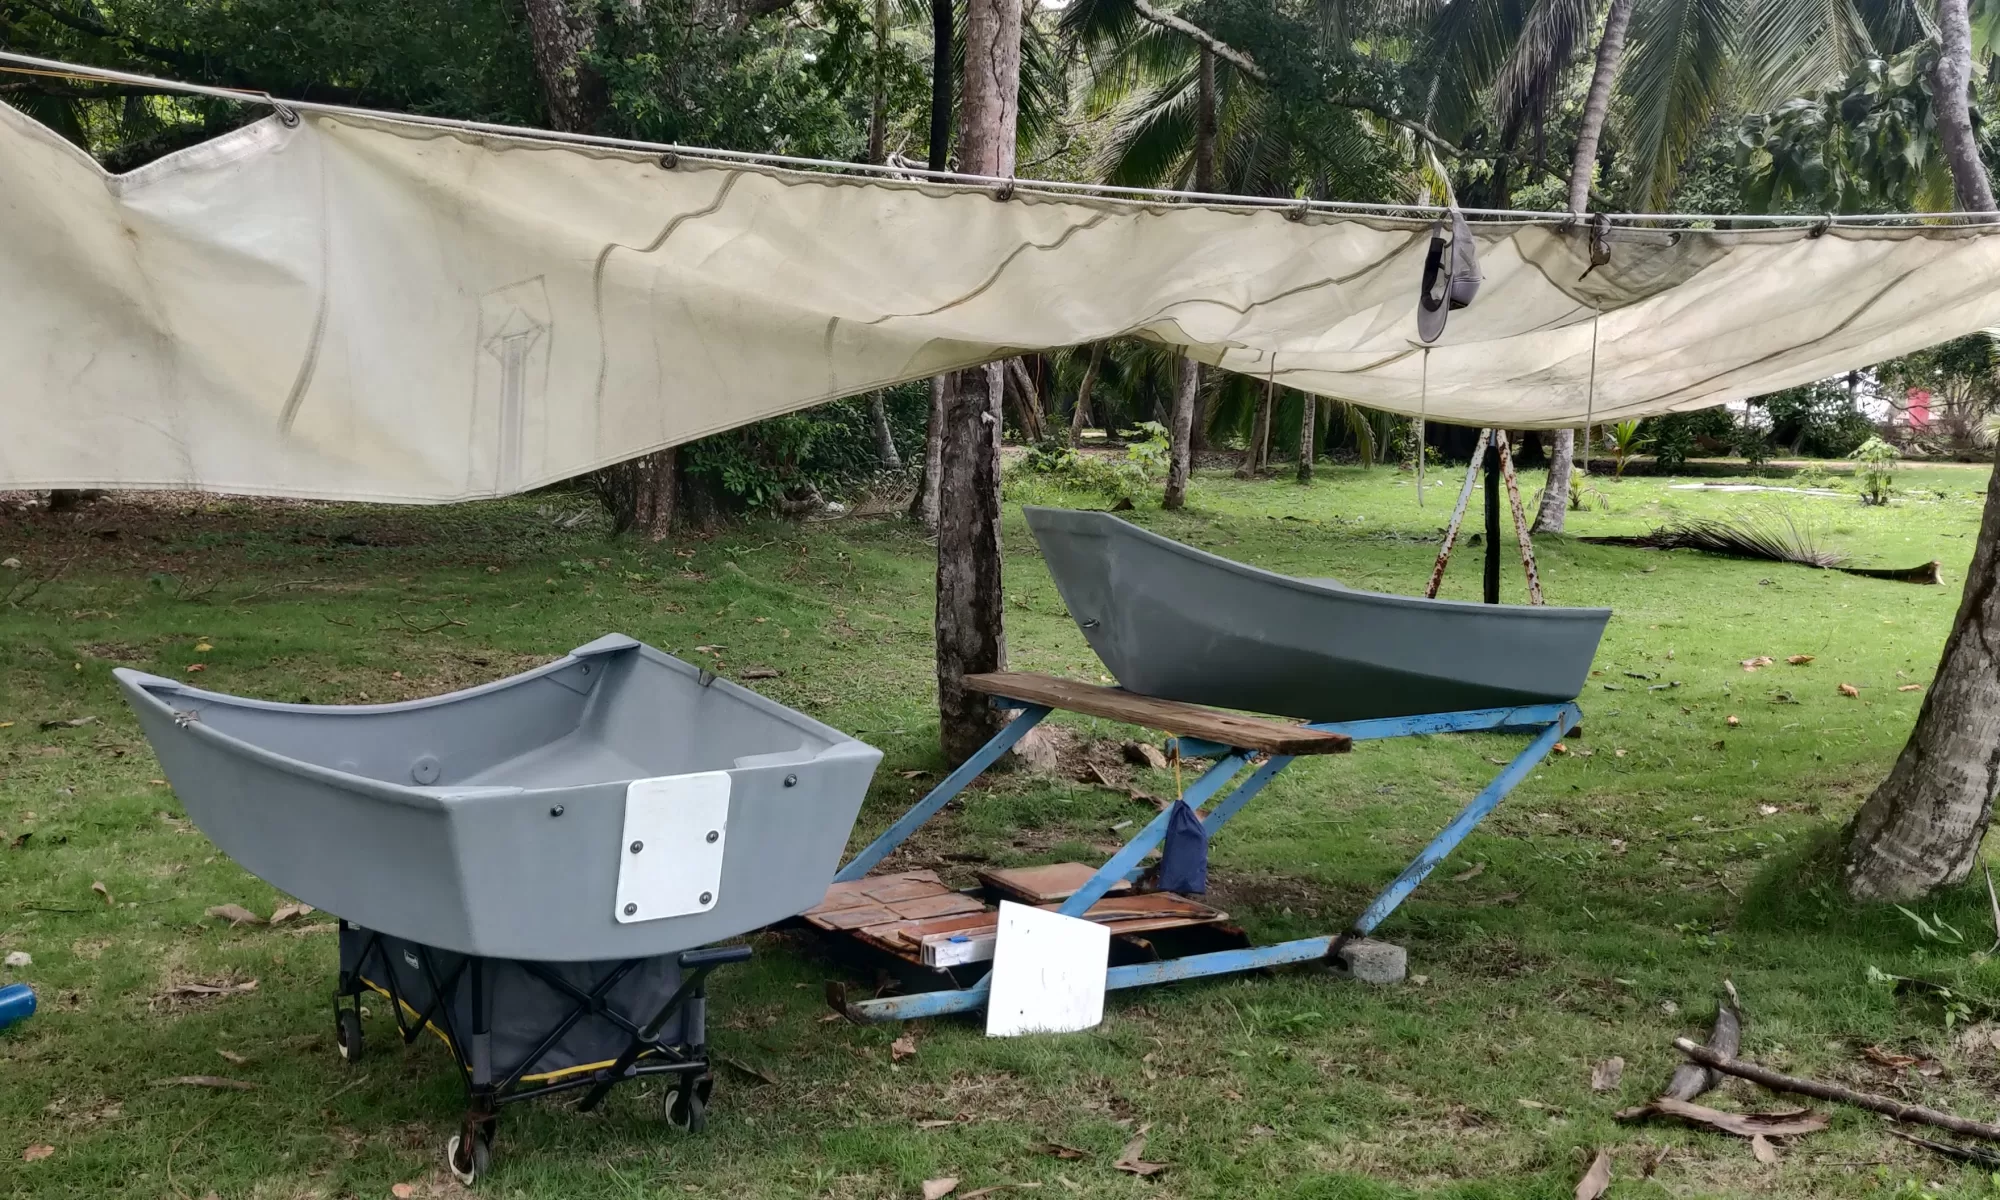
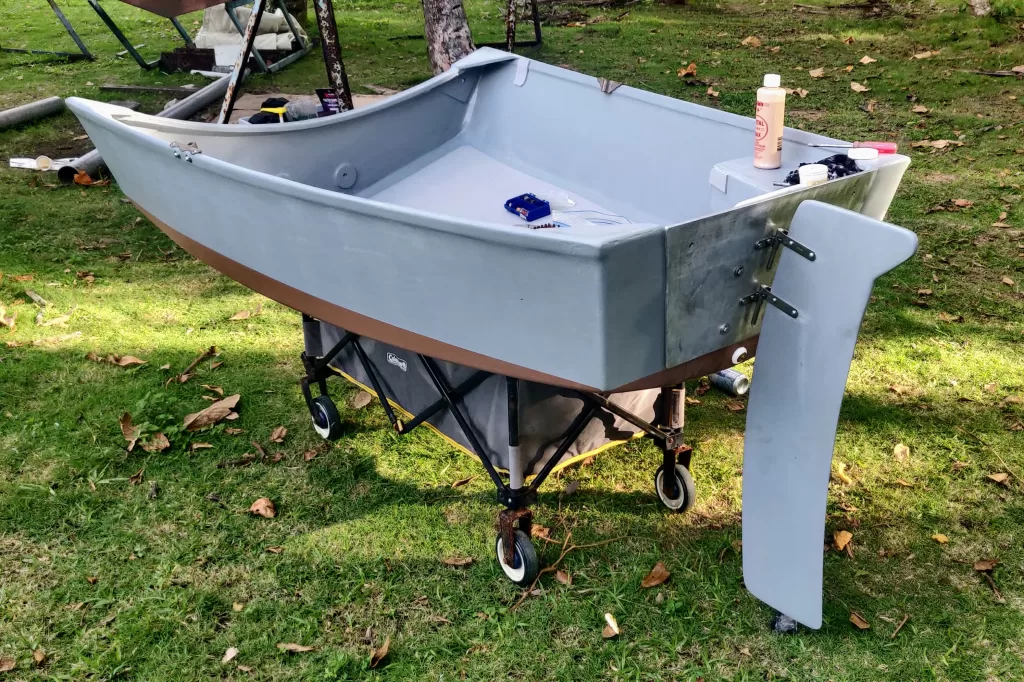
Despite all of the fun, I spent much of my time working on various projects to improve our lives afloat. I continued work on our recently constructed dinghy, adding additional components to enable us to sail it in comfort and style. Here are the highlights:
- Daggerboard and trunk constructed from fiberglass and epoxy resin
- Rudder with pintles and gudgeons installed on transom
- Mast step, mast and sprit constructed from aluminum tubing
- Transom reinforced with heavy duty aluminum
- EVA foam padding installed on floor
- Coppercoat antifouling applied to the bottom of the hull
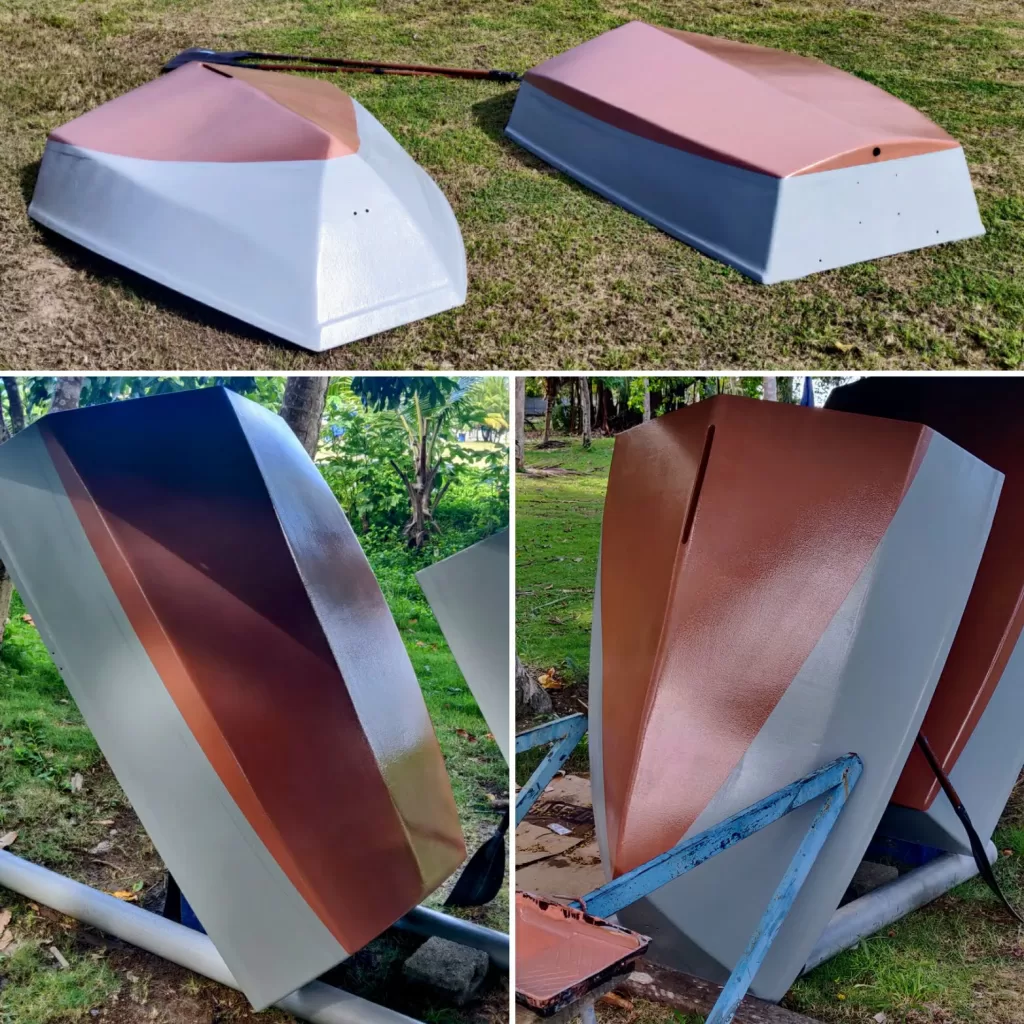
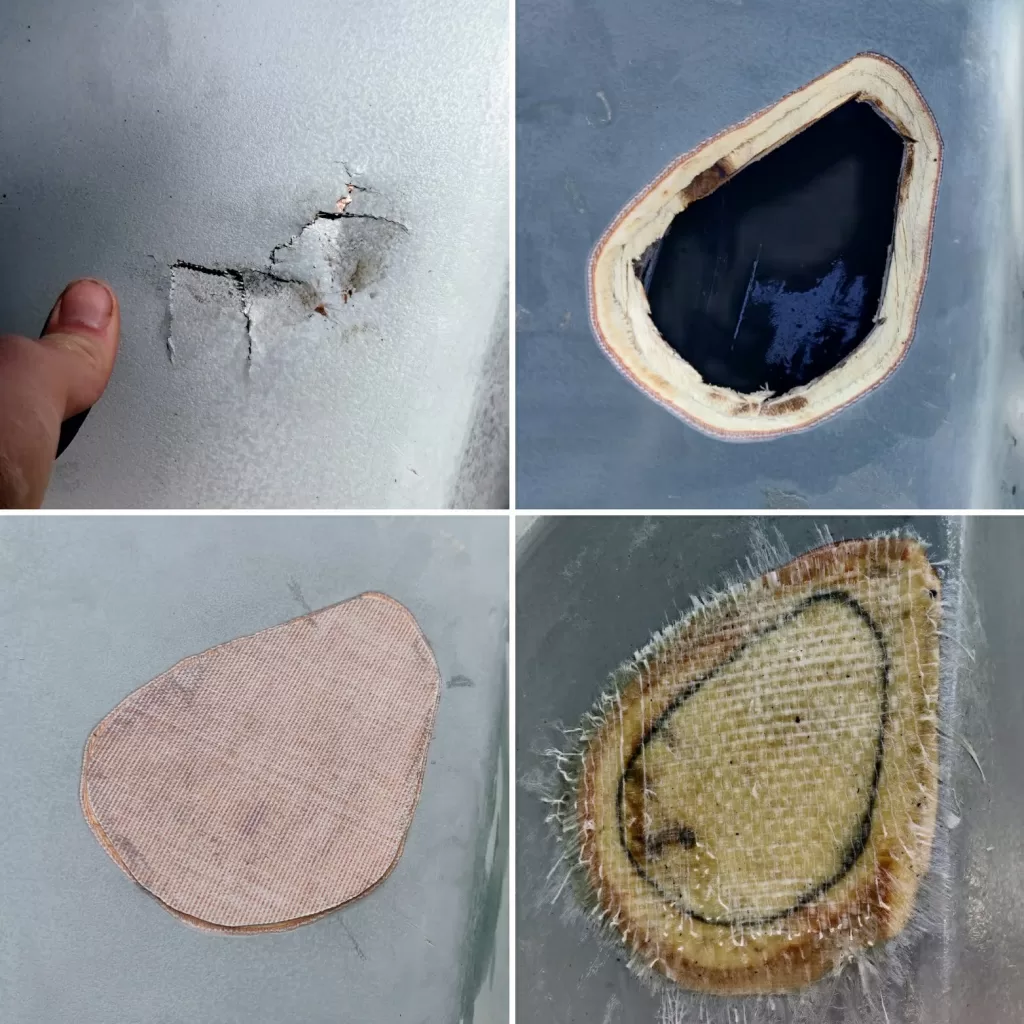
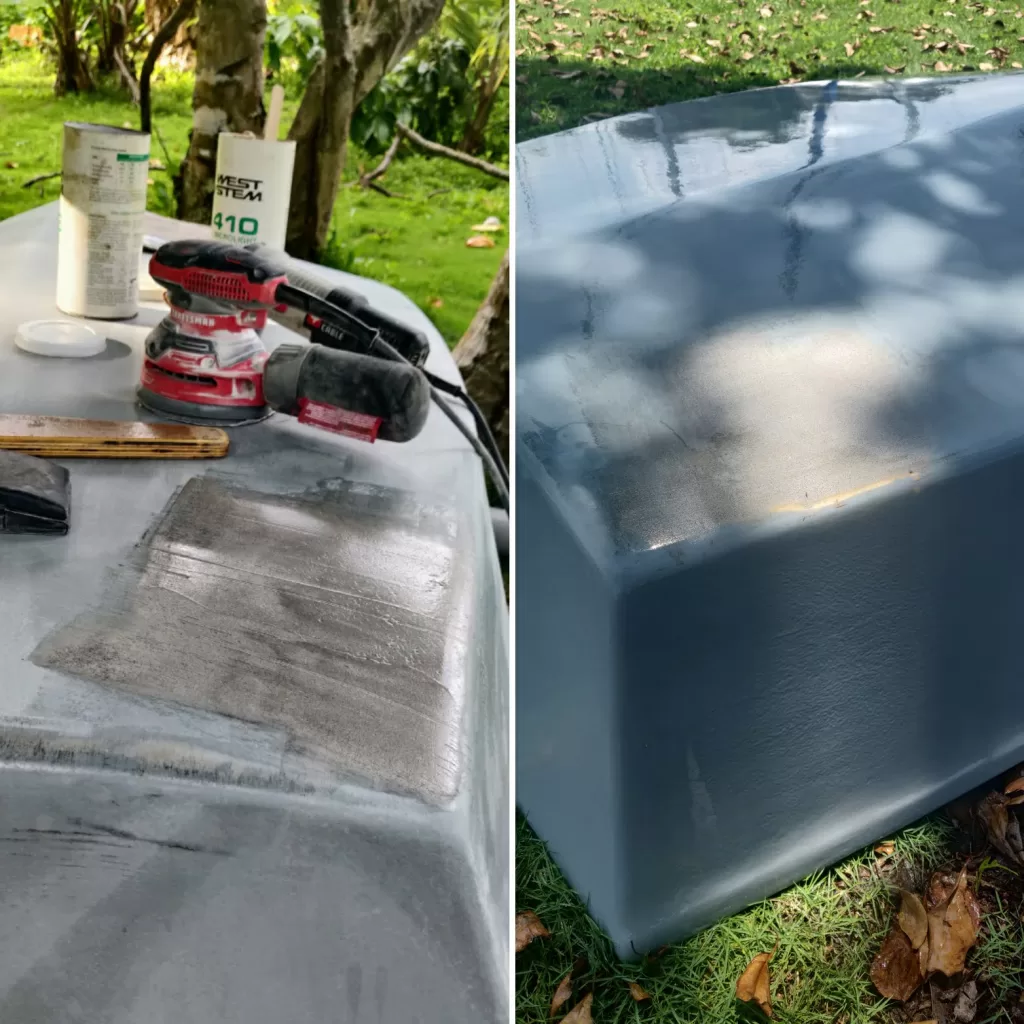
This whole dinghy project has taught me one thing: work indoors whenever possible! While building the hull in a makeshift beachfront workshop was hard, finishing these improvements in a rainy, windy coconut grove proved even more frustrating. After preparing for weeks, I arrived at the boat to begin applying Coppercoat antifouling to the bottom of the hull only to find a wayward coconut had miraculously fallen from a nearby tree, bounced underneath my tarp canopy and punched a fist-sized hole through the bottom of the stern hull segment… Repairing the hole added nearly 4 more days to an already long project…
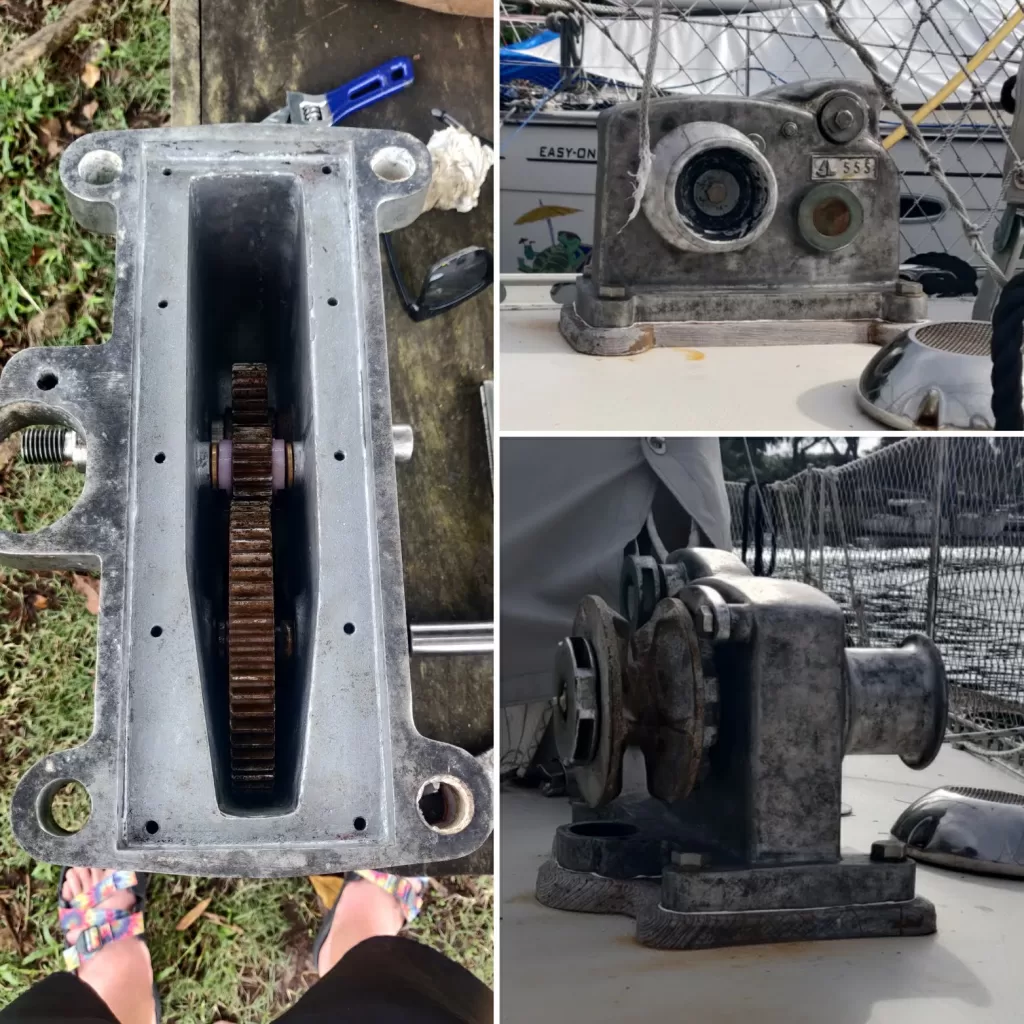
Anchoring and Plumbing
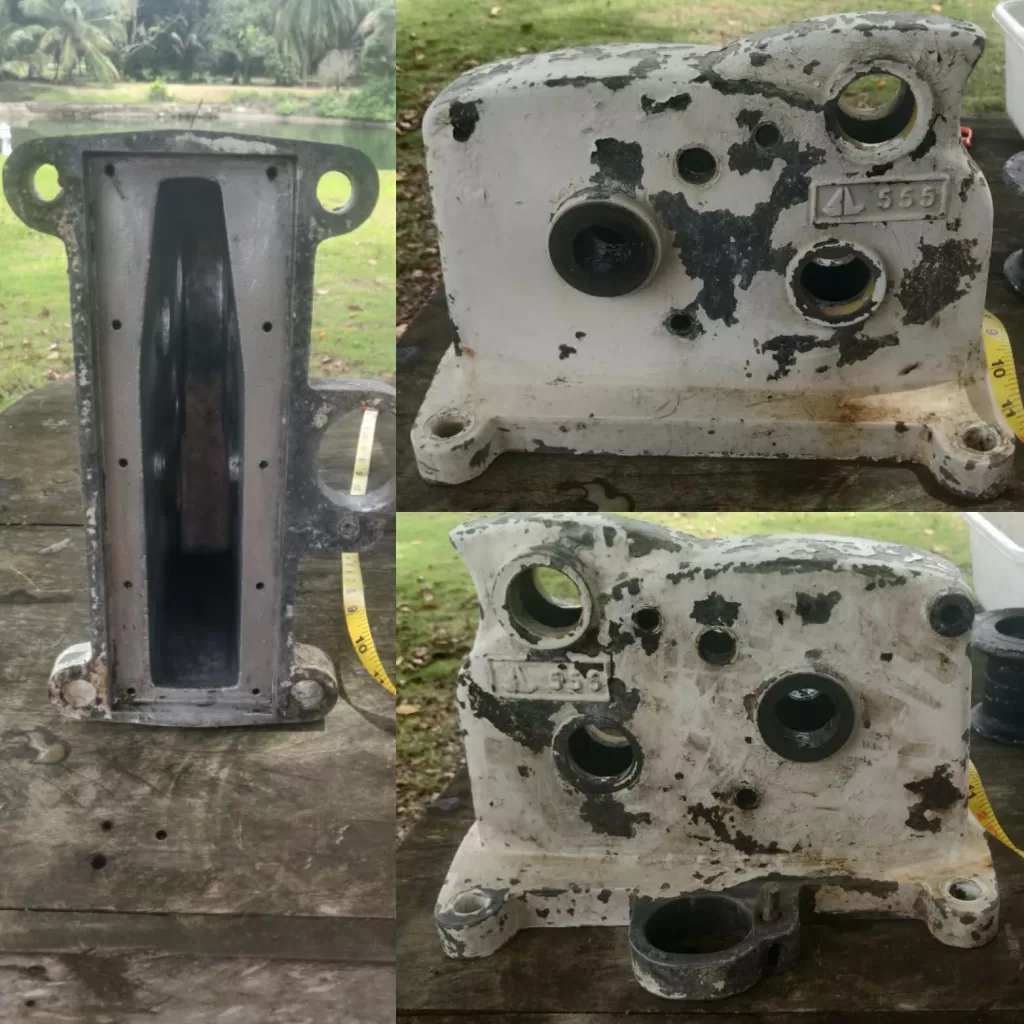
While safely tied to a dock, the windlass was finally unused for long enough to disassemble, clean and re-grease, a task I had postponed for much of a year spent anchored out continuously. I ordered a few replacement bushings, pins and o-rings from the old factory in Scotland and sourced some heavy-duty marine grease from Colon. I also took the opportunity to strip off the flaking paint from the case, leaving a clean, brushed aluminum surface that should be much easier to keep clean.
Down to the Wire
But the main event, the whole reason we had to return to Panama from South America, was the rigging! As soon as we returned to Panama from Ecuador, we began searching for wire rope to completely replace all of our standing rigging. The one local source for such wire rope was purported to be out-of-stock of the sizes we needed for upwards of 3 months, so instead we opted to order from Miami Florida and have the spools shipped via ocean freight to Colon. The added cost of the shipping more than made up for the higher local price and extra time spent waiting. Our shipment took roughly 15 days to travel from the vendor in Frorida to our slip in Turtle Cay Marina, not bad considering how far all 177 lbs had to travel!
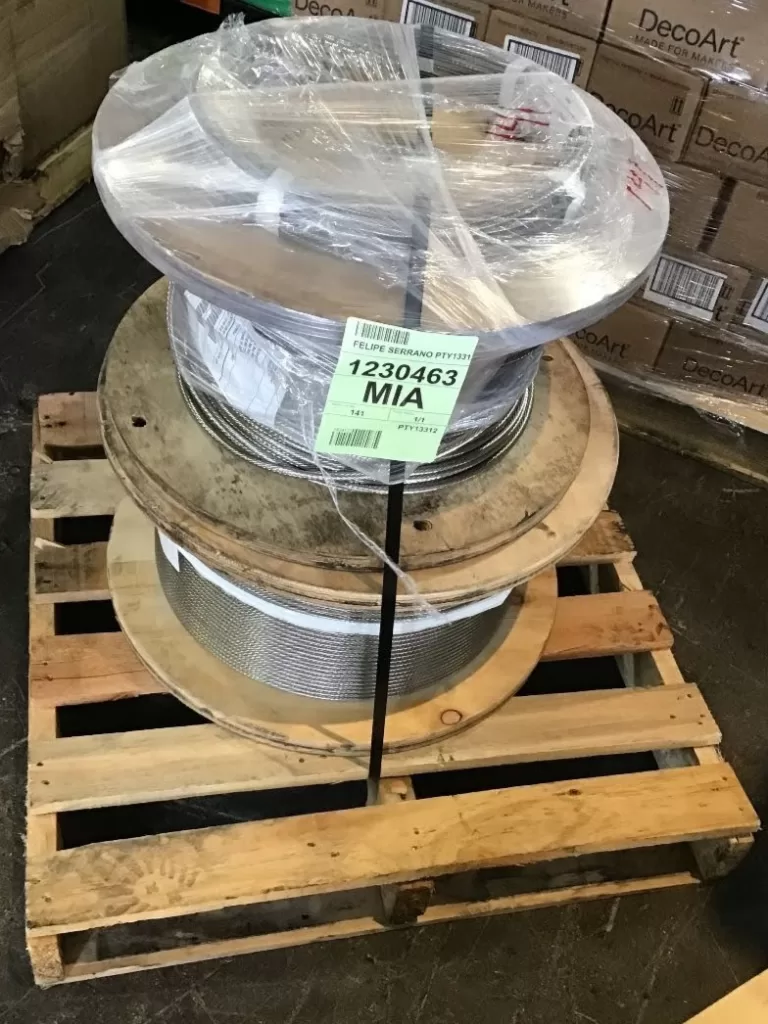
Thanks to our mechanical Sta-Lok terminals, I didn’t need any special tools to replace the rigging myself. One-by-one, I removed each stay/shroud/jumper, disassembled the terminal, measured and cut the new segment of wire rope and re-assembled the fitting.
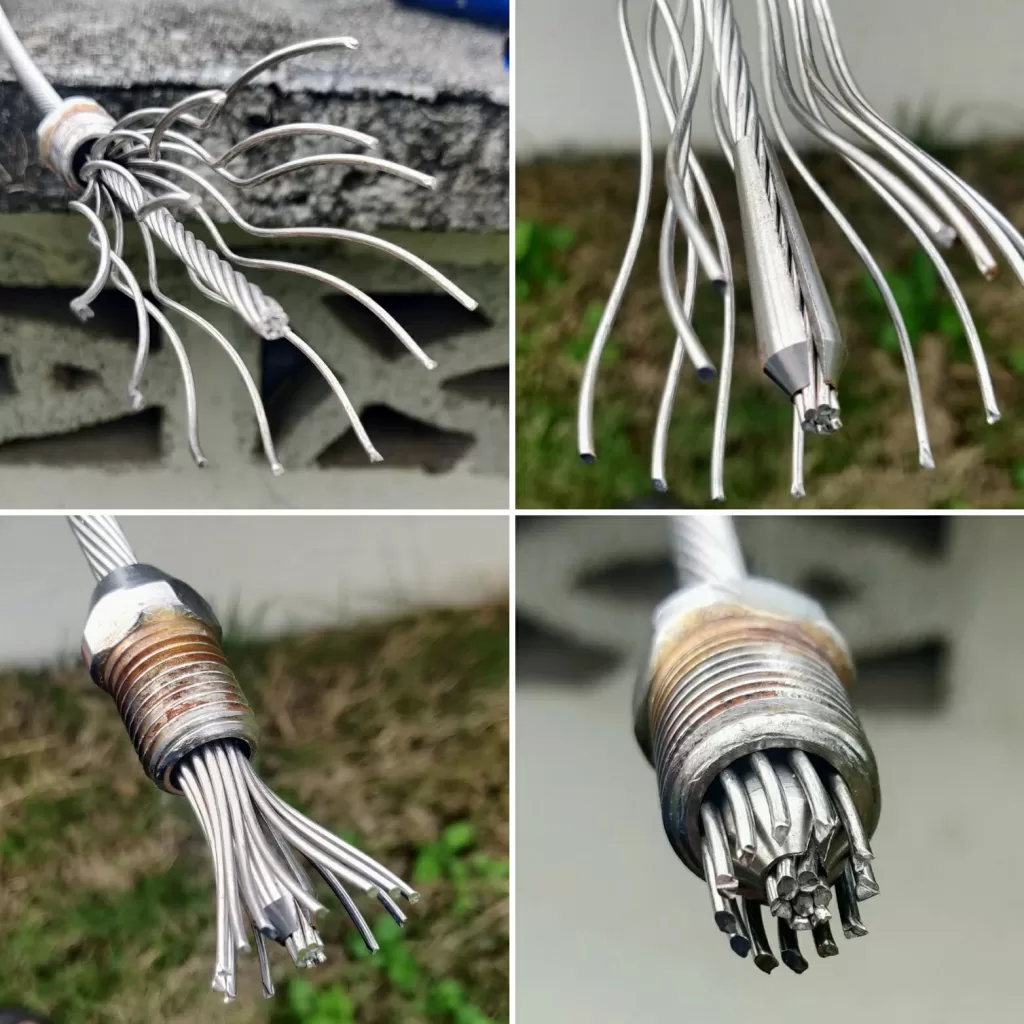
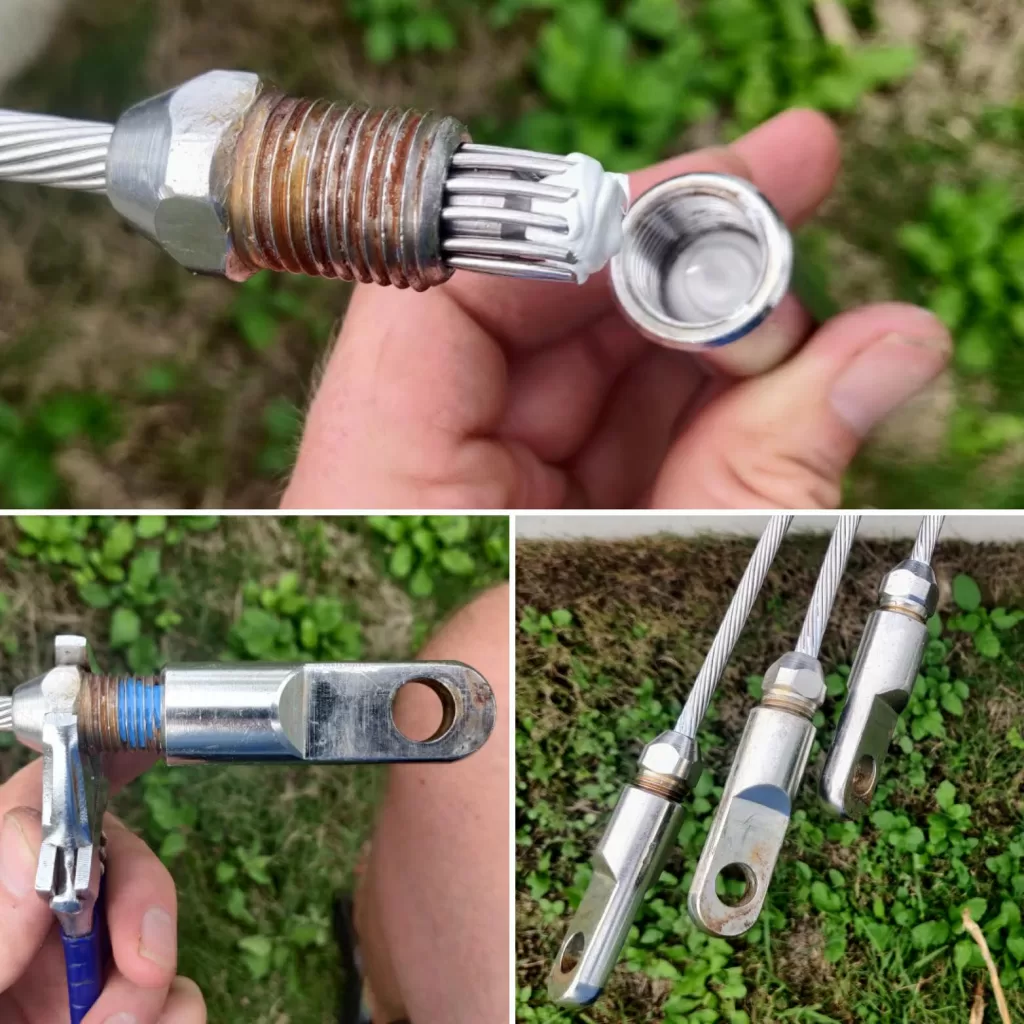
It would have taken me exactly one week to replace all 8 shrouds, 3 stays and 2 jumpers had it not been for one hiccup! I discovered that the terminals at the base of each upper shroud were 1 mm larger than the wire rope! Somehow, they held in place for 20 years without failing, but I didn’t want to risk catastrophe and chose to order two appropriately sized terminals before finishing the installation. 5 days later, everything was installed, tuned and ready to sail. Over the coming months, we will have to re-tune the tension of each wire rope as they stretch with use.
At any rate, Rua Hatu and its many accessories got some much needed TLC while parked in TCM for the summer. Once Janine returns from her travels in Europe, we’ll be ready to begin exploring the Caribbean and beyond!